|

On eBay Now...
Star Trek, Phaser Part POLISHED ROD Acrylic Emitter CNC Perfection Laser Use For Sale

When you click on links to various merchants on this site and make a purchase, this can result in this site earning a commission. Affiliate programs and affiliations include, but are not limited to, the eBay Partner Network.

Star Trek, Phaser Part POLISHED ROD Acrylic Emitter CNC Perfection Laser Use:
$10.29
In general: all parts are shipped with the machine finish as shown in the LISTING PHOTOS. Final finishing is by the Buyer (prop maker) and may include whatever; polishing, graining, distressing, acid washes, electroplating, and other treatments as selected and executed by the Buyer. Most parts will have some cosmetic blemishes that the Buyer may/may-not want to remove or enhance. Thank You.Star Trek TOS, CNC Acrylic 12mm LSR Emitter, POLISHED ALL OVER, 5/32 inch 12mm LSR Bore reproduction of TOS P2 Rodd Emitter CNC acrylic to mimic the original
I ship the POLISHED acrylic emitter you see in the photos: MAIN LISTING PHOTO SHOWS PART AFTER WASHING IN MILD DETERGENT. WASH PARTS PRIOR TO USE TO REMOVE CNC COOLANT RESIDUE. SALE INCLUDES ONE ONLY CNC acrylic emitter (not cast, CNC Acrylic) Larger 5/32 inch 12mm LSR Bore and engine lathe fitted to my nozzles bore of .3090 inches. Aluminum nozzle and other Installed Reference Pictures shown for reference only and other items are not apart of sale. Bore was increased from 1/8 inch to 5/32 inch to reduce 12mm LSR beam sidewall-splash on higher power 12mm LSRs in the 4-6 watt ranges. Enlarged 5/32 inch 12mm LSR Bore is for a 12mm LSR beam, the bore is not drilled with a 12mm LSR, but is POLISHED and perfectly concentric to the outer bore within 0.0002\" This acrylic 12mm LSR emitter was modeled with great care by examination of my archive Rodd Phaser Kit acrylic emitter. This acrylic 12mm LSR emitter is secured with clear adhesive (such as an epoxy) and as such a very small fitting allowance is made for the adhesive. This is not a force-fit part. The fitted POLISHED CNC 12mm LSR acrylic emitter, in this sale, extends just over 1 inch beyond the Outermost-Face of the aluminum nozzle. The acrylic emitter protrudes a total of just over 1-3/16 inches beyond the Inner-Recessed-Well of the aluminum nozzle. This is generally considered Set Accurate. The fitted POLISHED CNC 12mm LSR acrylic emitter, in this sale, is in total about 1-1/2 inches overall long. The can be used as a replacement emitters on all aluminum nozzles including the Rodd Trials and Tribulations Phaser Kits; Size is 1-1/2 inches long x 0.300 inch shank diameter. Allows for fitting with clear epoxy or similar adhesive. For glass clear finish; 1000 grit, 2000 grit, optional 3000 grit, 3M Compound or McGuires, as prop builders you all know the drill. I also make exact John Long P1 CNC REPLACEMENT EMITTERS. CLICK HERE FOR ALL ACRYLIC EMITTERS AND MOONS
Contact me your questions and concerns.
My LSE Module Adjustment and Install suggestion is as follows:This is a suggestion and you are the prop maker responsible for the result, aka not me...
1. LSR Module; remove chrome focus ring from brass-lens-assembly and discard chrome ring only (don\'t lose the brass lens assembly and related backing-spring).1a. Remember all beams are rectangular (not round).2. Mount LSR Module in a heat-sinking fixture and refocus the now \"unfocused\" lens so the beam is tight.3. I use a $5 aluminum fixture from AiXiz on , mount the heat-sink fixture on a cigar-box with; a switch and battery-power sled.4. Focus at 10 to 20 feet away, wearing safety goggles, so one can observe when the beam-spot appears \"tight\" on the wall surface.4a. I use a razor (module-off) to turn the brass-lens-assembly as the focus ring was removed in Step One.5. Once focused; Mark the back of the module with a sharpie to indicate the horizontal orientation of the rectangular beam.5a. Consider a drop of LocTight Light (get it on ) on the brass lens assembly to keep it locked in place. Remove excess with Q-Tip.6. Caution, the modules get hot so flip-on & flip-off just long enough to observe the beam spot on the wall.7. Instal the acrylic emitter perfectly square and aligned in the aluminum nozzle.8. A 12mm aluminum rod, with a groove filed at last 1 1/2 inches on the LONG side, makes a great emitter fixture, get the rod on .9. The groove releases any suction that occurs from the vaseline and the post the EPOXY setting of the acrylic emitter.10. NOTE: Groove is very important in 12mm aluminum rod.11. Prior to using this rod-fixture with acrylic emitter and epoxy; coat with vaseline as a glue bond-breaker or the rod will get glued to the aluminum emitter.12. Secure the vaseline coated 12mm rod in a vise LEVEL ALL WAYS, next slide the aluminum nozzle onto the rod, now coat the interior of the aluminum-nozzle emitter hole lightly with epoxy and slide in the emitter giving it a gentle twist (JUST ONE TWIST) to spread the epoxy evenly. Check for alignment and squareness. 12a. After the epoxy sets a few hours; check to see the hole is 100% clear; if not clean out from back with a 5/32 inch drill bit, but by hand (no power tools this step).13. Install the module in the nozzle so the sharpie-line is in-line with the set-screw securement hole (you must tap the pre drilled hole and provide the #8-32 set screw).14. Snug the set-screw (not gorilla tight).15. If you observe \"splash\" (splash is the beam coming out straight BUT ALSO bouncing off the interior-wall or the emitter hole) the tips of exacto blades make good shims just insert and snap-off AND YOU CAN usually get the splash to go away.
If results are not good the problems are most likely; (1) focus LSR module chrome focus ring was not removed, (2) 12mm LSR module is too far back in aluminum nozzle as; the focus ring is in-the-way OR, the module is out-of-tolerance and, or the acrylic emitter is glued-in too far back and lastly, (3) the acrylic was installed a little crooked. Troubleshoot and try try again...
Some Star Trek Prop History For Inquiring Minds:
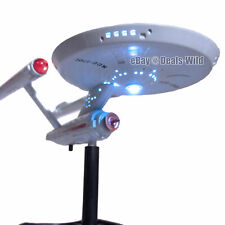
Star Trek USS Enterprise Light Up NCC-1701 Ship Toy Classic TOS Original Series $19.96
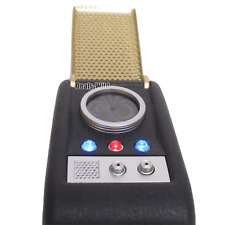
Star Trek Communicator Light Up Sounds Classic TOS Original Series Enterprise $19.96
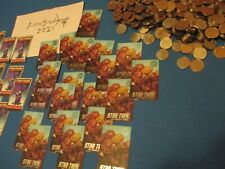
dave & buster’s star trek tribbles tribble rare card /s coin pusher Dnb $8.00
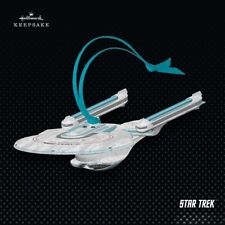
2024 SDCC EXCLUSIVE Star Trek S.S. EnterpriseNCC-1701-B Nexus damage ornament $74.88
Eaglemoss Star Trek Ship Replica | Kobayashi Maru $29.99
Star Trek-Space NCC-1701 The Final Frontier Ring Size 10 silvery (metal) $5.99
Star Trek U.S.S. Enterprise 1701-D – Enterprise Replica Bluetooth Speaker $66.49
KeySmart Pro Star Trek TOS Edition w/ Tile Smart Location Technology NEW SEALED $39.00
|